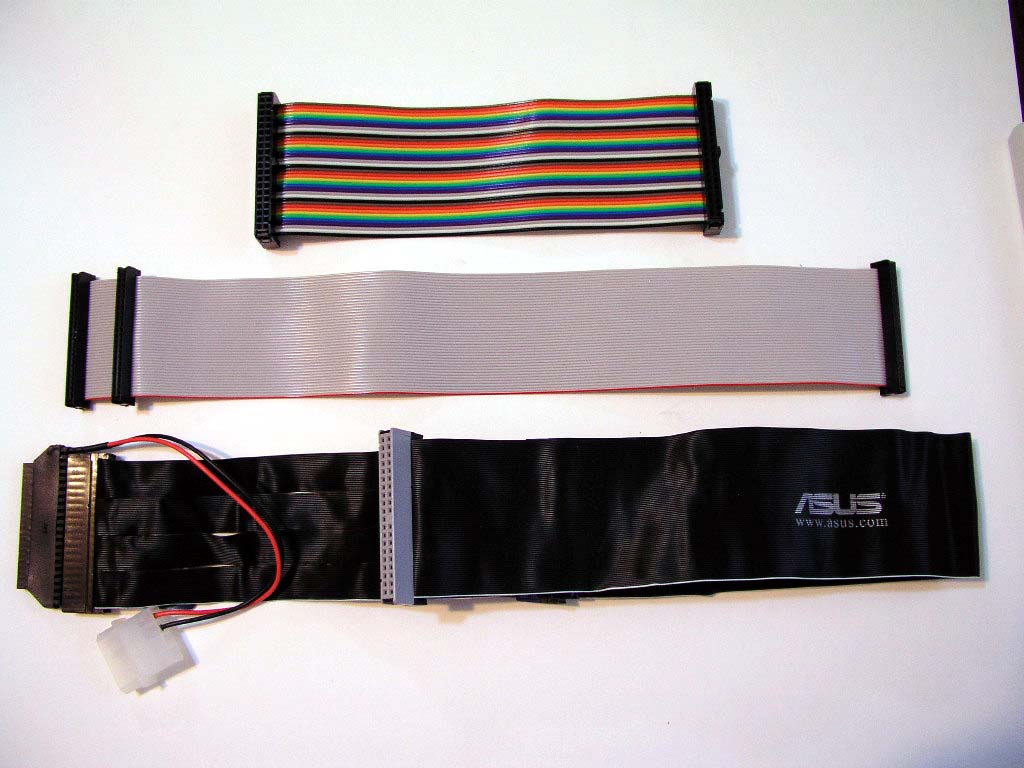
IDE / ATAPI interface tape drives are still in use in many small business servers across the country. These devices are simple to setup and configure if a few simple rules are observed with regard to propper cabling and installation. The IDE/ATAPI bus speeds are far slower than U320 SCSI or the new SAS interfaces so ensure you allocate enough time for your backup window.
Improper bus configuration or bad cables are by far the most likely culprits when facing issues such as:
- Devices not being seen in the operating system.
- Intermittent or unexpected “I/O” errors.
- Losing communication with a tape drive during backup.
- Event ID 9 or 11 errors in Windows.
- Unexpected bus resets.
If your tape drive is not being detected by the operating system, or if the system is experiencing unstable operation, try the following fault finding steps.
Make sure the IDE cable is an Ultra-DMA (80-conductor) cable. The Ultra-DMA speeds require the use of an 80-conductor cable. Using a standard 40-conductor IDE cable will result in unexpected behavior. The 80-conductor cables can be identified by the color coding of their connectors.
Connector Color
Location on Cable
AttachmentBlue End of cable This connector attaches to the IDE controller. Grey Middle of cable This connector attaches to the slave device if two devices are on the bus. Black End of cable This connector attaches to the master device. If there is only one device attached to the bus, it is considered the master and should be placed at the end.
Check the configuration of the IDE devices attached to the bus. An IDE bus can have one or two devices attached. With two devices attached, one will be designated “Master” and the other “Slave”. It does not matter which is which. IDE tape drives can be configured as Master, Slave, or Cable Select through the IDE configuration jumper block on the rear panel of the drive. If Cable Select is chosen, both devices attached to the bus must be configured as cable select.
Use Cable Select… If the tape drive is the on ly device on the bus OR if a second device is on the same bus and it is also configured to use Cable Select. Use Master… If the tape drive is the only device on the bus OR if a second device is on the same bus and it is configured as Slave. Use Slave… If there is a second device is on the same bus and it is configured as Master.
Check the connectors. Make sure the connectors are well seated to any attached devices. Also check that none of the connectors have been pulled away or disconnected from the cable itself.
Try another cable. Even if the cable appears to be in good condition, it could be the source of any unstable operation. Try another Ultra-DMA (80-conductor) IDE cable.
Try connecting the tape drive and another device on the same bus. Some system BIOS’s will not see the tape drive if it’s alone on the secondary bus. Or, maybe the tape drive will be seen in the BIOS, but once the operating system is started, the tape drive is not seen there. Try configuring the bus with a CD-ROM as Master and the tape drive as Slave.
Upgrade your system BIOS. Many systems display the current BIOS version during boot or in the BIOS configuration utility, usually accessable during system boot. (Different systems use different methods for starting the BIOS configuration utility. Check your system documentation.) Updated BIOS versions may be available through the PC manufacturer’s website.
Check your system BIOS settings. Many systems have any unused IDE channels turned off by default. Make sure you have enabled the secondary IDE channel if you are connecting your tape drive to the seconary channel.
